 en
en
R4 chassis repairs
by David Gamlin, 2004-07-10
'The car is back on the road and going very well. The parts cost about £400 and the work took about 100 hours. On top of that I spent money on body panels and did quite a lot of repairs to the body. If I was doing it again I'd just buy a new chassis. I guess if it were only necessary to replace the floorpan itself then it wouldn't be too bad but I haven't seen too many cars in that condition.'

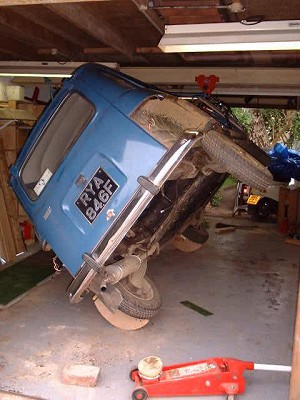
'Car being turned onto its side. Note plywood rollers bolted to wheels and roll of bubble wrap to arrest any unintended fall.'
'Nearly there. You can see the winch trolly on the RSJ used to lift the car.'
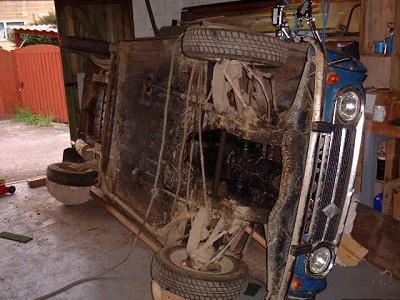
'The car is now supported on the gutter around the doors which spreads the weight evenly. The ply rollers are designed so that they present this area of the car to the ground at the correct angle (allowing for a board and some carpet to protect the paintwork).'
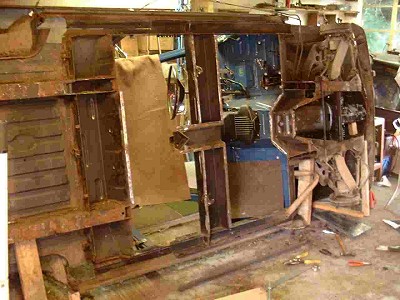
'All the heavy parts of the car have been carefully propped. As you can see I even left the engine in. The theory is that once any weight has been supported the bodyshell is stiff enough to support and maintain the shape of the chassis. After removing the suspension the old floorpan has been cut away as well as about 25mm of the bottom edges of the side members and various other areas including the chassis legs. I hired a small plasma cutter which was well worth it.'
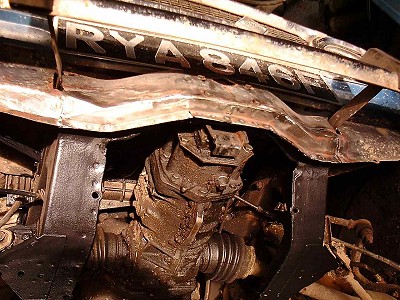
'Finished repair to the front cross member. This is quite tricky as there is so much going on inside this section and it is important not to alter the position of the gearbox mount.'
'The front of a sidemember with bottom edge and triangular reinforcement in position. The wheelarch closing panel (available from renault) can also be seen. Note how the bottom of the body sill and the apex panel have been cut away to gain access. The sill section was simply welded back afterwards and the apex panel was to be replaced anyway.'
'A better view of the closing panel and a repaired chassis leg. Note also the new jacking point bracket (had to make those myself).'
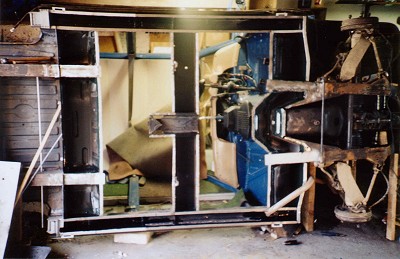
'All chassis legs and sidemembers repaired and the fantastic replacement rear suspension mounts in place. The suspension mounts are available from renault and are intended as a rust repair panel. They are made of 2mm sheet and are about 500mm long. It is necessary to make up a jig to fit these accurately but it is fairly straightforward. The distortion you can see here is from the camera lens and not as a result of removing the floorpan. The whole structure remained pretty rigid throughout.'
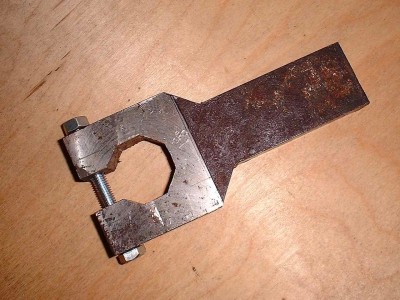
'This is the tool I made up to undo the front torsion bars.'

'Here it is in action inserted in length of scaffolding tube. In this case the bar is being tensioned for refitting (no helpers available on that day so I had to use a winch).'
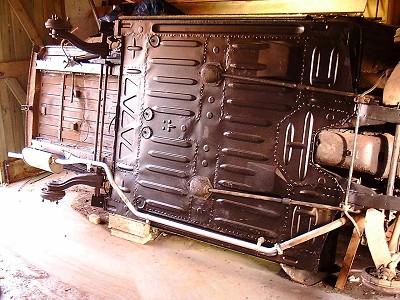
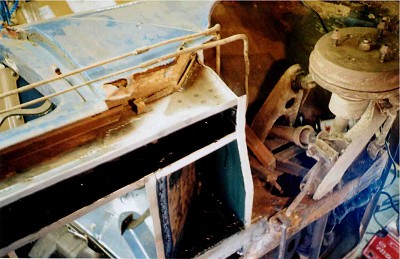
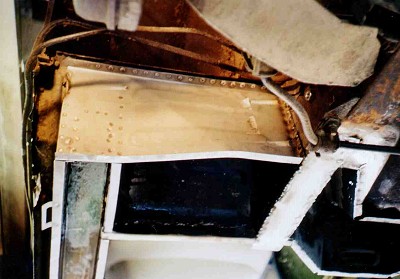
'The new renault floorpan welded in and the suspension refitted. I spot welded the edge seams and plug welded the inboard ones that the spot welder could not reach. The whole is finished with two coats of epoxy mastic - a two pack product that claims to be tougher than other underbody finishes - we shall see.'
 home |
 articles |