 en
en

Body preparation and exterior trim repainting (part 1)
by Peter Gumbrell, 2002-03-27
This first instalment of a two-part tutorial explains some of the techniques involved in touching up the bodywork of your R4. It was written shortly after I spent some time performing body repairs on a vehicle restoration course, and contains many photos of the work done on the Renault 4 that I owned at the time.
In summer 2001, a year after I purchased secondhand my second R4, I decided to set to work on repainting the car, as its original condition was very tatty, despite being in a good state chassis-wise and mechanically. I had never really done any serious Renault 4 body repair work before this, aside from a few largely botched attempts to patch up some rust on my first car, and so a lot of the methods I learnt were new to me. Many of the areas covered will be familiar to Renault 4 owners, and hopefully other people reading this who are unsure how to set about such tasks might gain some tips or the confidence to have a go themselves. Most of this work is quite straightforward, but requires a lot of effort and hard graft. Depending on how much attention the bodywork requires, and how much perfection you are seeking in the finished product, preparing and respraying your car could take anything from a few days to a couple of years!
This first part of the article covers the many months during which I occasionally completed various jobs, whilst the second part outlines the final stages of preparation and the respray itself. Bear in mind that the majority of the work comes in the preparation. If that isn't done right, it won't matter how good the spraying is, hence this is where the majority of your effort will be focused.
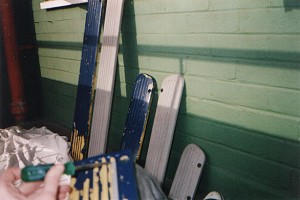
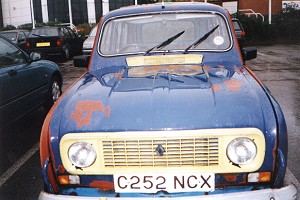
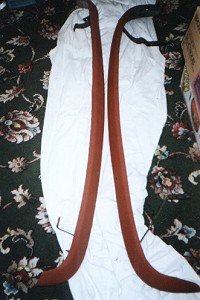
Above, you can see the plastic side panels that are attached to most GTL models. In my own case, they had been partly painted over with both blue and yellow paint, and were very tatty looking, so I decided to strip the paint completely down to their original light grey base. This was a tedious task. There is probably some kind of paint stripper that could be used on plastic, and which would make the job far easier, but short of such wonders I used a flat screwdriver to scrape and flick the paint off (seen above), which took hours. It is difficult to use any kind of sanding device or large scraper, due to the textured pattern on the panels, and the grooves which run along them. Eventually, I got rid of every last speck of paint, but there were still some dirty marks which could not be removed, and the scraping had caused some minor scratches, so I thought it worthwhile to repaint them, as you'll see later. It's unlikely you'll need to perform this job, but if you ever have to flick paint off like this then use a pair of goggles as the flecks constantly ping into your eye. In my case, having little funds, a pair of sunshades had to suffice!
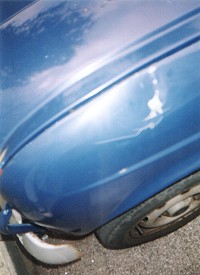
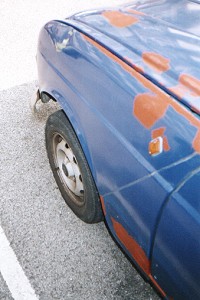
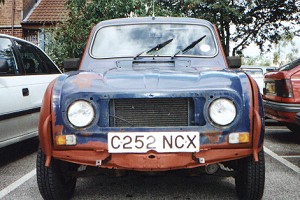
My R4 was parked in the car park of the council owned tower block in which I resided, and one afternoon I was sat at my computer, probably busy preparing things to put on this site as ever, when I heard a noise from the car park eleven storeys below. Salford, in Greater Manchester, is a quite awful city in many respects and is notorious for car crime (see My Pics entry number MP6 in the Gallery for proof). My own estate is no exception, so whenever I hear any such noise outside, I rush to the window to check that some horrible little scallie git isn't tampering with any of the cars, which is a frequent occurrence. On this occasion, however, there was a council worker carrying a door from a property to his van, and the noise had been caused when he propped the door against the van. As he opened the back of the van, either as a result of this or a strong gust of wind, the heavy internal door fell against my car which was parked adjacent. It created a football sized dent on the near side front wing, as seen above, although this blurry photo doesn't show the scale of the damage. The worker then picked the door up and rested it against the front of my car, briefly surveying the dent but seemingly not being bothered enough to do anything. He put the door in his van and drove off, and from the height of my flat, I was unable to obtain the number plate, his van being one of many hundreds of similar vehicles operating around the city.
I could not see how bad the damage was from my position over 100ft in the air, and indeed I hoped there was none at all, but upon inspection the next day (Friday the 13th of all days) I found a nasty dent in the very place where the door had fallen. Fortunately, another resident of my block had also witnessed the event, and he came out to offer his support should I pursue any action. I telephoned the council on two occasions and they said they were investigating. After a period of hearing nothing, I wrote to them and demanded a reply within 7 days, else I would take legal action. I enclosed a couple of estimates from garages for repairing the damage. The council sent a one-sentence reply stating that they would send a proper reply within another few weeks; not very helpful. By this time it was clear I would not have this matter resolved before I attended the 40th anniversary R4 event in Holland in early September 2001, so I would have to turn up in a dented car. For this reason, I was not motivated to finish all the work and repaint the car before the event.
I sought legal help on several occasions, and the Citizens Advice Bureau attempted to contact the council, who consistently made excuses for the delay. I was advised, however, that I couldn't pursue a claim in the small claims court until they responded, or I had exhausted all possible methods of contacting them. Eventually, having returned from Arnhem in the Netherlands, I received a letter denying all responsibility for the incident. The council claimed that they had - (rather conveniently) - been unable to identify my vehicle during a recent visit, which would have been whilst I was abroad with the car, and so had no further proof. Fortunately for them, the array of security cameras positioned around my tower block were all focused away from the location of my car, or at least that's what they reckoned, as I was not allowed to view the tapes myself. I was now advised by the CAB that I could finally pursue action against them, but would you believe it, the witness who was crucial to supporting my case had moved out that very week and left no forwarding address. Of course, it would be wrong and totally foolhardy of me to suggest that the council, aware well in advance of the witness's end of tenancy date, might have deliberately postponed their reply to stifle me. No, surely they wouldn't do that, after all, the woman in charge of the matter took about three months to send her reply which I'm sure was time well spent on other important matters (such as the letter sent to all tenants demanding we do not feed pigeons).
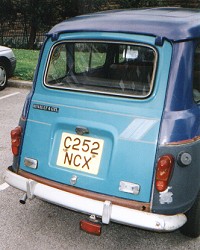
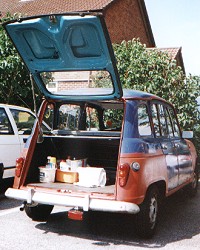
Okay, now I've got that off my chest, on with the repairs.... On the above photo you may notice the section underneath the rear door - and behind the bumper - is very rusty. There was a two-inch square hole on the off side needing some filler. I used some wire mesh to plug the hole on the rear side, and smeared some filler over it, then sanded it down the following day after it had hardened. Note that the two rear lower quarter panels are still in their black primer, having been fitted new before I bought the car; you can even see the price sticker which took ages to sand off. The front and rear bumpers were both silver, but despite any deceptive appearances in the small picture, were very tatty as with the rest of the car, and were going to require rubbing down and repainting.
For anybody unfamiliar with the basics of body filling work, here's a brief summary:
To start off, you should obtain some 'wet and dry' paper, in different grades. Many retailers will not specialize in this and you will only be able to buy a pack with three textures (fine, medium and coarse), which is adequate, but if possible get hold of a range of thicknesses, from coarse P80 sheets through to extra fine P1200 types. In particular, you should acquire more mid-range varieties such as P400 and P600. It is impossible to specify exactly which grades you should use for a job, as it will depend on the severity of the rust, the location, and the area to be covered. Practice and experience will give you the best idea. You will also require some standard body filler, such as a tub of 'Isopon / David's P38' or equivalent. If you have many areas to fill then look for one of the large tins as it is always better to be generous with your coverage, and it is surprising how much you can get through. Also, as mentioned before, you will doubtless find more and more areas needing attention as you go along. If you are seeking perfection, it can be worth investing a little more in a higher quality filler, which will be less lumpy and leave fewer air holes.
An additional consideration when working with body filler is some safety equipment. Although many people will forgo these materials you really should take the issue seriously, as filler is a dangerous material. If it gets onto your skin, in your eyes, or is inhaled, it can cause damage, and when used repeatedly over long periods can be a cause of serious conditions including cancer. You may think that just doing one job won't do any harm, but one job every few months for many years is enough to be a problem. Get yourself some latex gloves (these can be bought in boxes of 100 or so quite cheaply), a pair of goggles and a good dust mask. Note that many of the cheap, throwaway types of mask don't offer any real protection against toxic substances (it even says this on the back of the packet). If you are considering doing frequent body repairs on vehicles, it is worth investing in a professional extractor, onto which you can fit specially made sanding blocks. In the second part of this bodywork tutorial, you can see such a machine pictured.
(If there is a hole, then depending on its size, you may need to patch it first with some wire mesh and fibreglass padding. Anything larger than about 1cm square will definitely require this. Where possible, affix the mesh to the rear or underside of the body, having carefully cut it to fit the hole. The glass fibre filler (such as 'Isopon / David's P40' or equivalent) usually looks like a load of hairs soaked in orange juice. It is not very attractive stuff and is quite fiddly to use and apply, but it does provide a strong bonding material for larger holes, especially when spread over wire mesh. This should be allowed to dry and then sanded using the same technique as with the normal filler described later on. Possibly, you will need to use a coarser grade of paper, and you should definitely be looking at adding an extra layer of normal filler on top, no matter how smooth you might get the finish.)
Next, mix up some filler on a piece of scrap cardboard, using about 10% hardener, and ensuring you mix it thoroughly so that the hardener is evenly distributed, including on the spreader itself. Cover the affected area and leave it a little proud of the surface, ensuring you apply it thoroughly but quickly enough to smooth it over before it begins to firm up and go flakey. Drying can take anywhere from ten minutes to ten days depending on how much hardener you added, but professional heat lamps can be used to speed up the process. Once you become more accomplished at getting a good smooth coverage with the filler, you will probably add the hardener more liberally to get things done faster.
When fully dry, use a medium-coarse grade paper (e.g. P240) to rub the filler down. Make sure you rub back and forth in a straight line rather than in several directions or in circles. You can then adjust the angle slightly to flatten the edges of the filler. It is advisable to use a sanding block of some kind at this point (where accessible), in order that the level of filler matches the surrounding body. Be prepared to apply more than one layer of filler if necessary, washing with water and allowing to dry between each job, as it doesn't always come out right first time, or even second time. As you begin to get the filler flat, switch to finer grades of paper, perhaps a P600 or P800 to finish, else you may scratch the surrounding paintwork. To gauge the smoothness of the repair, you should use the front of your fingers to feel the panel. Don't rub single fingers or thumbs along as you may miss lumpy bits. Hold your hand flat with the fingers together and then feel the finished area. Finally, wipe the area clean with a damp cloth. It is well worth taking care of your spreaders; you don't want to have to keep buying new ones, and it only needs a little solvent and some kitchen towel to remove the filler off of them before it dries up. A single plastic spreader can last you years if treated well.
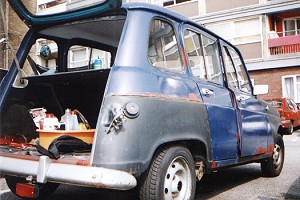
You will notice in many of the photos here that I coated all the filled areas with red lead oxide paint. This was because I knew that it would be some time before the car had its final respray, and I needed to protect all the treated areas in the meantime. I also needed to coat the three unpainted panels, which were still new in primer, but which were starting to rust. Red lead paint is quite cheap and is thick enough to apply just a single coat. Due to the density of the paint, it offers reasonable protection against water, and is a handy temporary solution for covering rusty areas. In the picture above, I removed the rear lights in order to paint the rear panels.
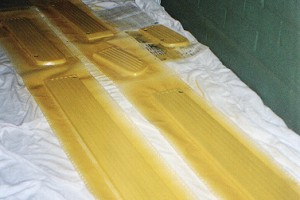
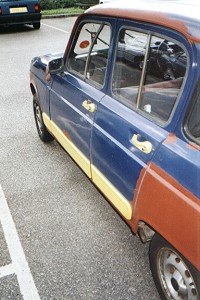
Meanwhile, back to the side panels which were previously removed. These were thoroughly washed, then sprayed bright yellow, along with the rest of the trim parts. They required about three coats, although some months later I gave them an extra coat just to be sure. When replaced on the car, they can be quite fiddly to attach because often the screws do not fit very tightly, and the very small square washers that fit the holes often get lost and are virtually impossible to replace. The panels are also held on by sets of nails which stick out of the body panels. Of course, only GTL models have these plastic panels; older Fours have either none at all or more flattering, sleek chrome or rubber trims, which are generally preferred amongst R4 owners. It is well worth having them on, though, as you are otherwise liable to acquire countless small dents and scratches on the doors from mindless idiots who park next to you and whack their doors against yours.
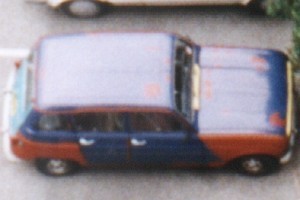
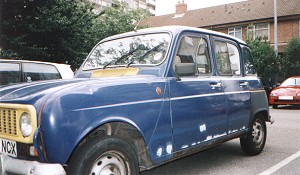
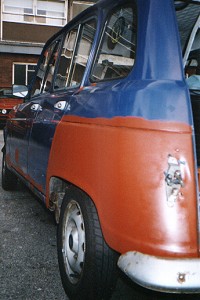
This picture was taken from the balcony of my flat, one hundred feet high, which explains the fuzzy appearance as I have zoomed in on it. I just rather liked looking at the car at this stage, because compared to all the other bland cars in the car park, the R4 looked very cheerful. The front grille and air inlet were both yellow when I bought the car, albeit rather faded, which was why I decided to continue with the theme and respray all the trim parts yellow. At this point the car was blue, yellow, had a turquoise back door and several blobby reddish-orange bits, along with silver front and rear bumpers. I would have been quite happy repainting the car in many different colours, although whilst living in Salford I feared that some depraved pratt would only try and spoil it if I did so. Despite the car looking fabulous since the full respray in 2002, I rather liked it when it was at this stage, as it suited my personality quite well. People would sneer at me from all angles, but I felt smug in the knowledge that it was their pathetic ideals that were laughable, not my free spirit!
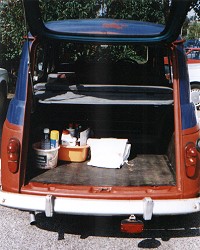
Although I know that I ought to attend to the source of the leak, I cannot afford the welding work required at this stage and this is my only solution. However, in neglecting this, I risk allowing more water to enter the back of the car, because my rear door (being a replacement off of another R4) isn't completely flush with the other panels, and water gathers in the small areas mentioned before, and also in the well around the rear door catch. As a result, some water penetrates and seeps down to the rear passenger doors. I can't win, basically. It's amazing how simple it can often be to cure the leaks. In my old R4 I had tremendous problems every time it rained, the mats in the front would be flooded, and I could actually feel it dripping down on my leg when driving in the rain. The cause turned out to be a couple of tiny holes in the rubber seal around the windscreen - barely visible though easily fixed by using a tiny amount of silicone sealant - but not until after I'd spent a few hundred pounds in extensive welding work to the chassis over a couple of years.
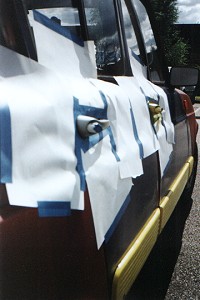
"What's going on here?" you may wonder. Well, back in my flat I was now repainting the front and rear bumpers. But what you can't see is the mammoth job required getting them off in the first place. Whoever had last fixed them on must have used the rustiest nuts and bolts they could find. I used every tool I had to try and loosen them, sprayed them with WD40 and even bought new tools, but they wouldn't budge. In the end, I had to resort to drastic measures. The guy I previously mentioned, who was my witness for the damage caused by the council, helped by allowing me the use of his electric drill. We struggled for ages, and it took him about an hour of drilling to break the last nut off. In principle, as with a lot of things on the R4, removal of the bumpers should be a straightforward task, but you can often find yourself struggling for hours, if not days with such things. These bumpers were washed and rubbed down, coated with red oxide (as seen above), then painted with two coats of yellow Smooth Finish Hammerite, using a brush. Again, I decided at a later date to give them another coat. Just remember when you replace any parts to grease all the nuts and bolts before you affix them back on, or you'll make life very difficult for either you or the next person who tries to remove them.
¹ A reader named 'SM' contacted me from Greece in 2003 via the guestbook (entry #255) to shed some light on the diamond-shaped hole at the front of the car, stating: 'It was used for engine hand-start. Engine changed, but not the body, so the hole remained, collecting mud.'
It would be some time before I continued with the bodywork and got around to the final respray. The second part of the tutorial covers this, and can be read by clicking here.
 home |
 articles |